Fusion O2C
Fusion O2C
1. Assign Inventory to BU using System Options
2. Setup Order Management parameters
3. Create Release Sequence Rules
4. Create Pick Slip Grouping Rules
5. Define Ship Confirm Rules
6. Create Picking Rules
7. Create Picking Rule Assignments
8. Create Pick Wave Release Rules
9. Create Staging Subinventory
10. Configure Shipping Parameters
11. Create Collector
12. Create Payment Terms
13. Create Statement Cycles
14. Create Customer profile class
15. Create Customer, site and address
16. Setup Customer account description
17. Assign reference data to BU
18. Assign Roles to User
19. Provide data access for user
20. Create Price list
21. Create Pricing Segment Value (Standard Lookups)
22. Create Pricing Strategy
23. Create Customer Pricing Profile
24. Create Pricing Segments
25. Create Pricing Strategy Assignment
26. Create Carriers (Shipping Methods)
27. Create Transaction Types
28. Create Planning Source System
29. Run “Collect Planning Data”
30. Create Sourcing Rules
31. Setup Sourcing Assignment Set
32. Set profile option: MSP_DEFAULT_ASSIGNMENT_SET
33. Create ATP rules
34. Run “Collect Planning Data”
35. Run “Refresh and Start the Order Promissing Server”
36. Create Sales Order
37. Validate Sales Order
38. Book Sales Order (Submit)
39. Pick Release
40. Confirm Pick Release
41. Confirm Shipping (Ship confirmation)
42. System Interfaces SO Information to AutoInvoice interface
43. Import Sales Order information into AR as AutoInvoice
44. Create Receipt and Apply on Open Transaction
Add ‘Order Management’ and ‘Supply Chain Planning’ offerings to Implementation project.
1. Assign Inventory to BU using System Options
Implementation project >> Task ‘Manage Receivables System Options’ >> Search your BU since we already completed this set up in AR
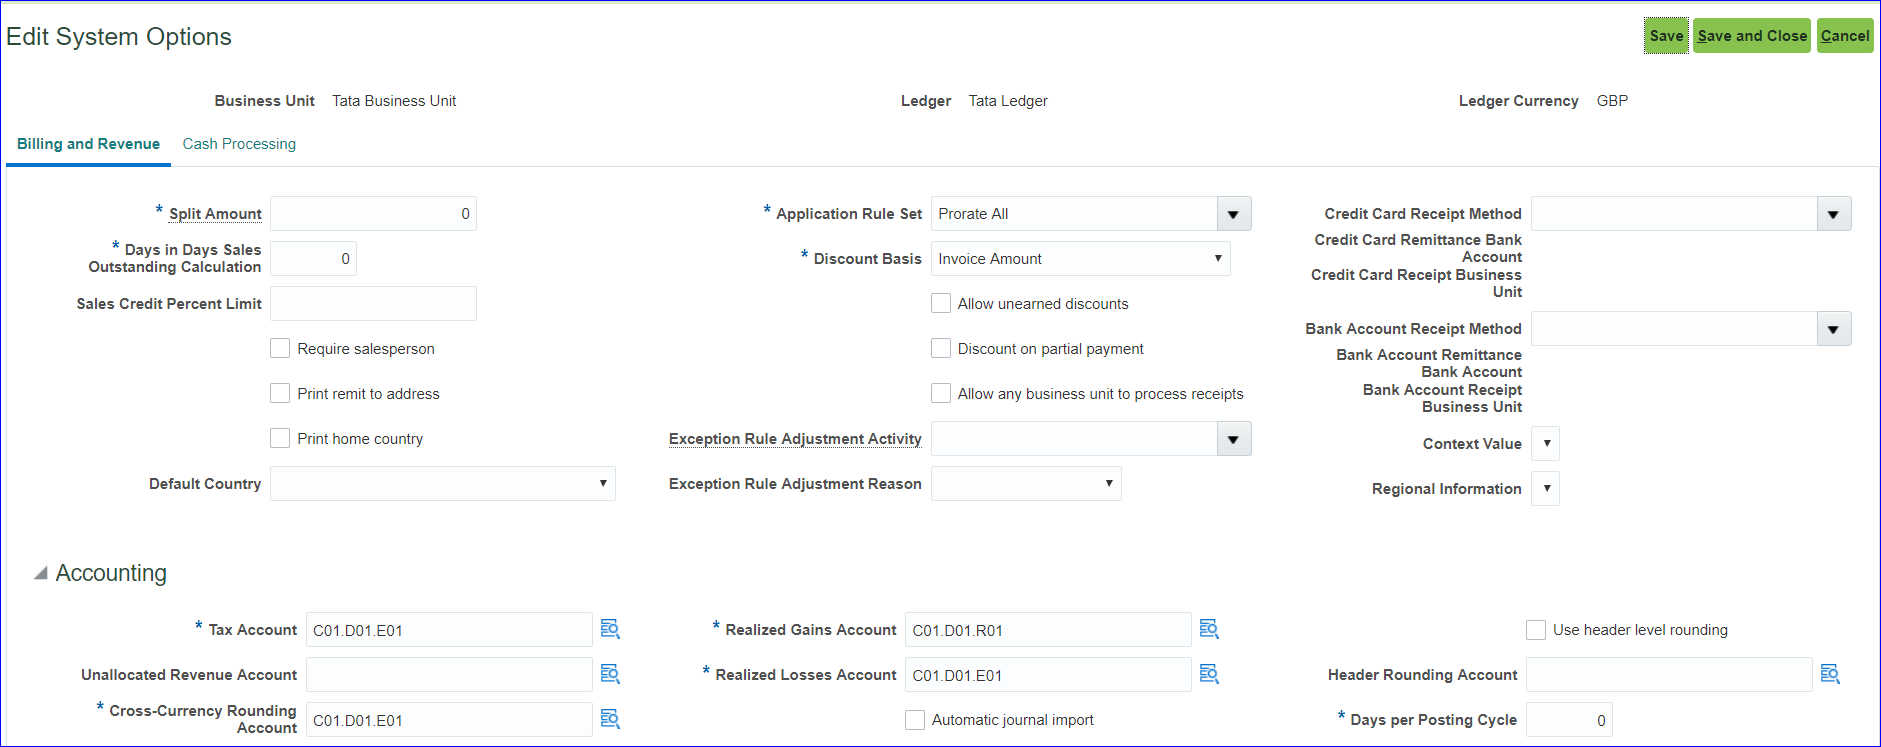
Save and Close
2. Setup Order Management parameters
Implementation project >> Task ‘Manage Order Management Parameters’ (Path: Order Management > Define Orders) >> Select ‘Item Validation Organization’ and enter BU
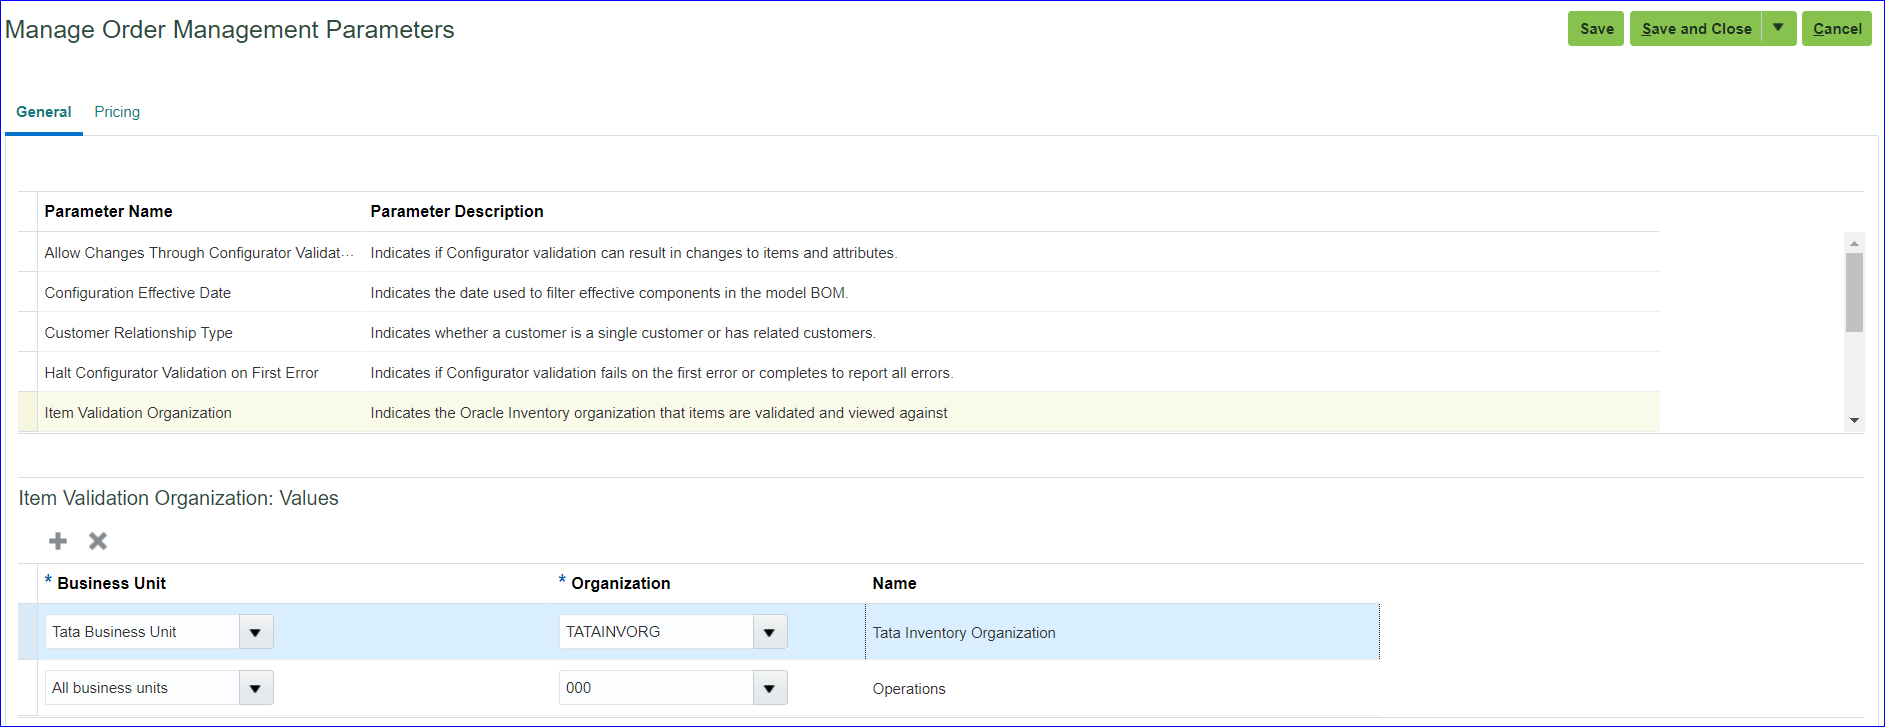
Save and Close
3. Create Release Sequence Rules
Implementation project >> Task ‘Manage Release Sequence Rules’ >> Create
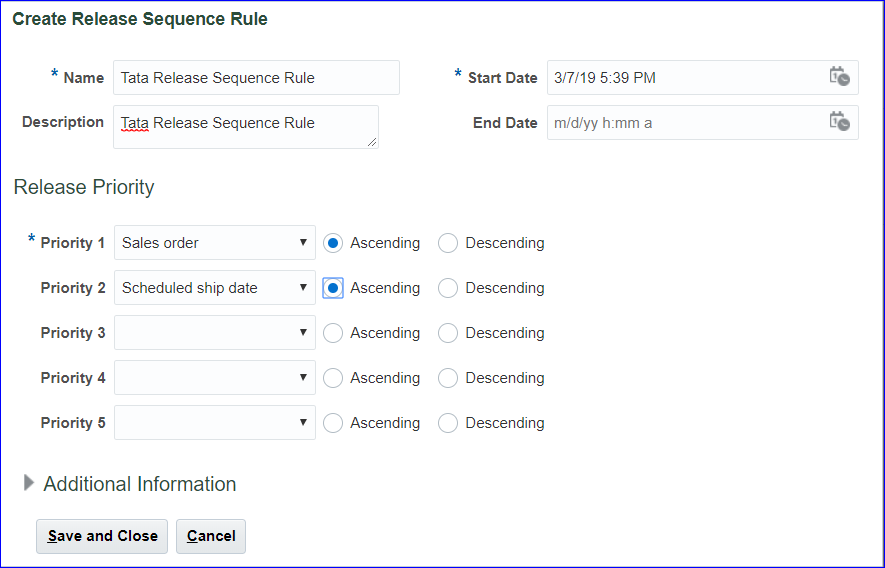
Save and Close >> Done
4. Create Pick Slip Grouping Rules
Implementation project >> Task ‘Manage Pick Slip Grouping Rules’ >> Create
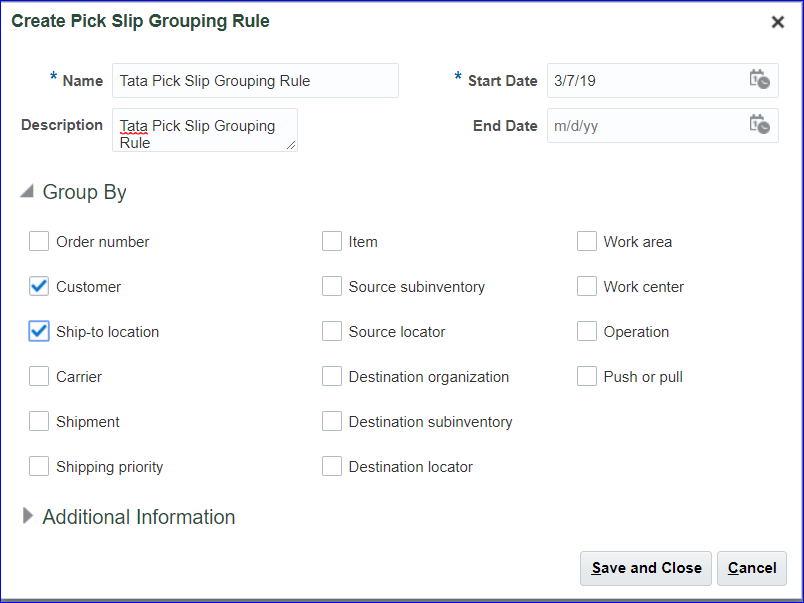
Save and Close >> Done
5. Define Ship Confirm Rules
Implementation project >> Task ‘Manage Ship Confirm Rules’ >> Create
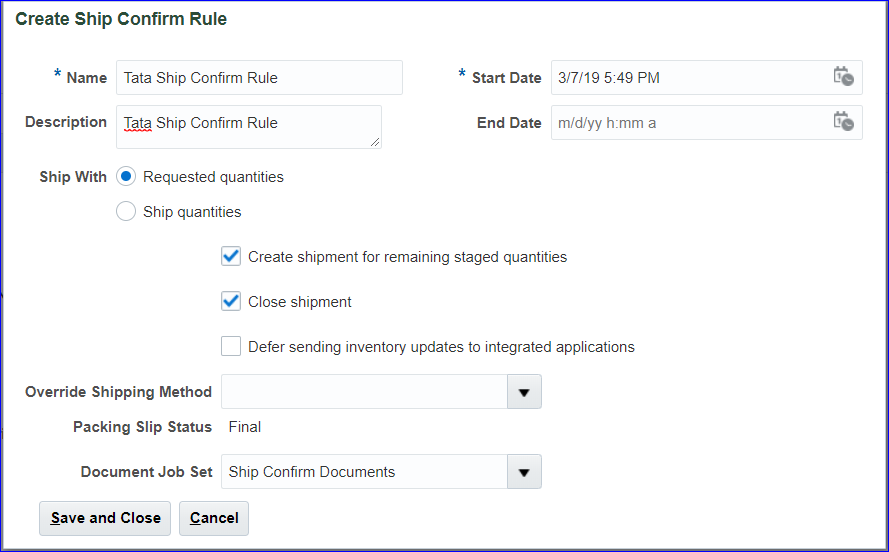
Save and Close >> Done
6. Create Picking Rules
Implementation project >> Task ‘Manage Picking Rules’ >> Create
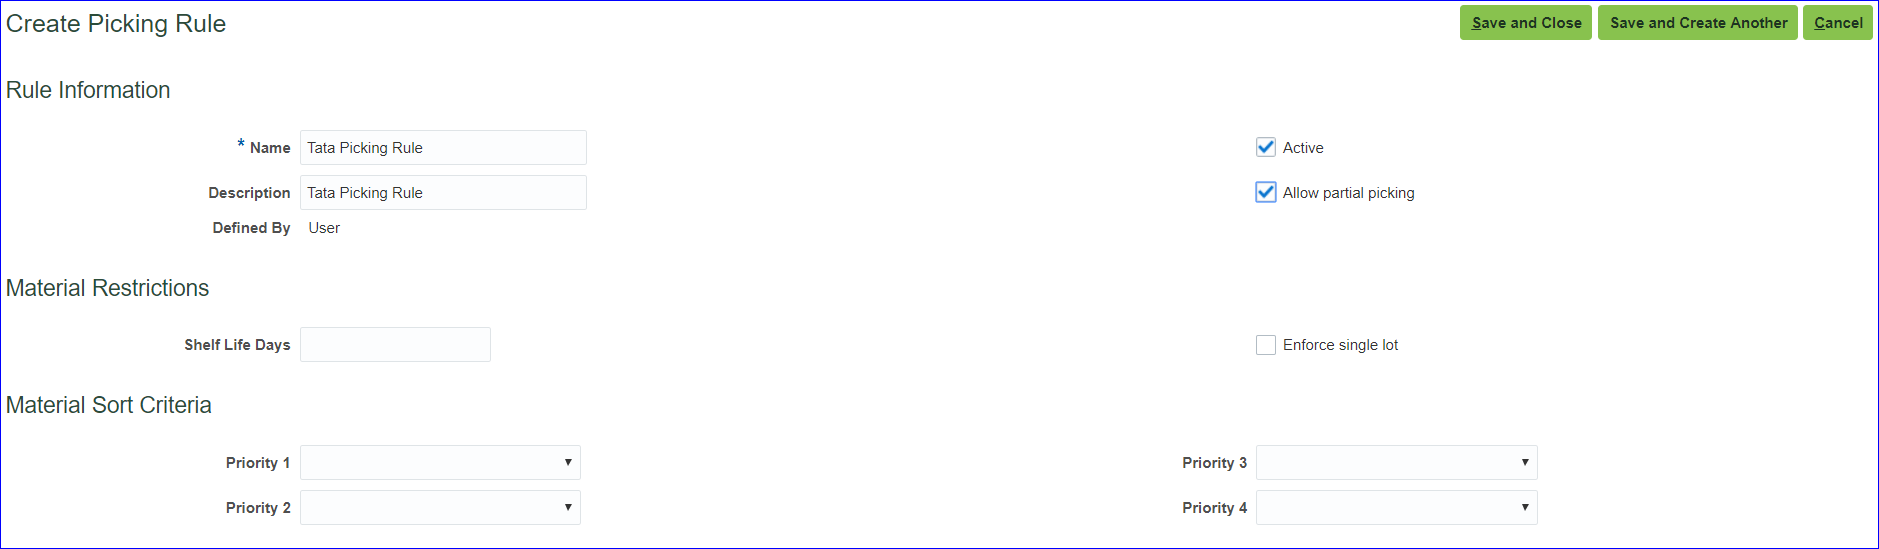
Save and Close
7. Create Picking Rule Assignments
Implementation project >> Task ‘Manage Picking Rule Assignments’ >> Create
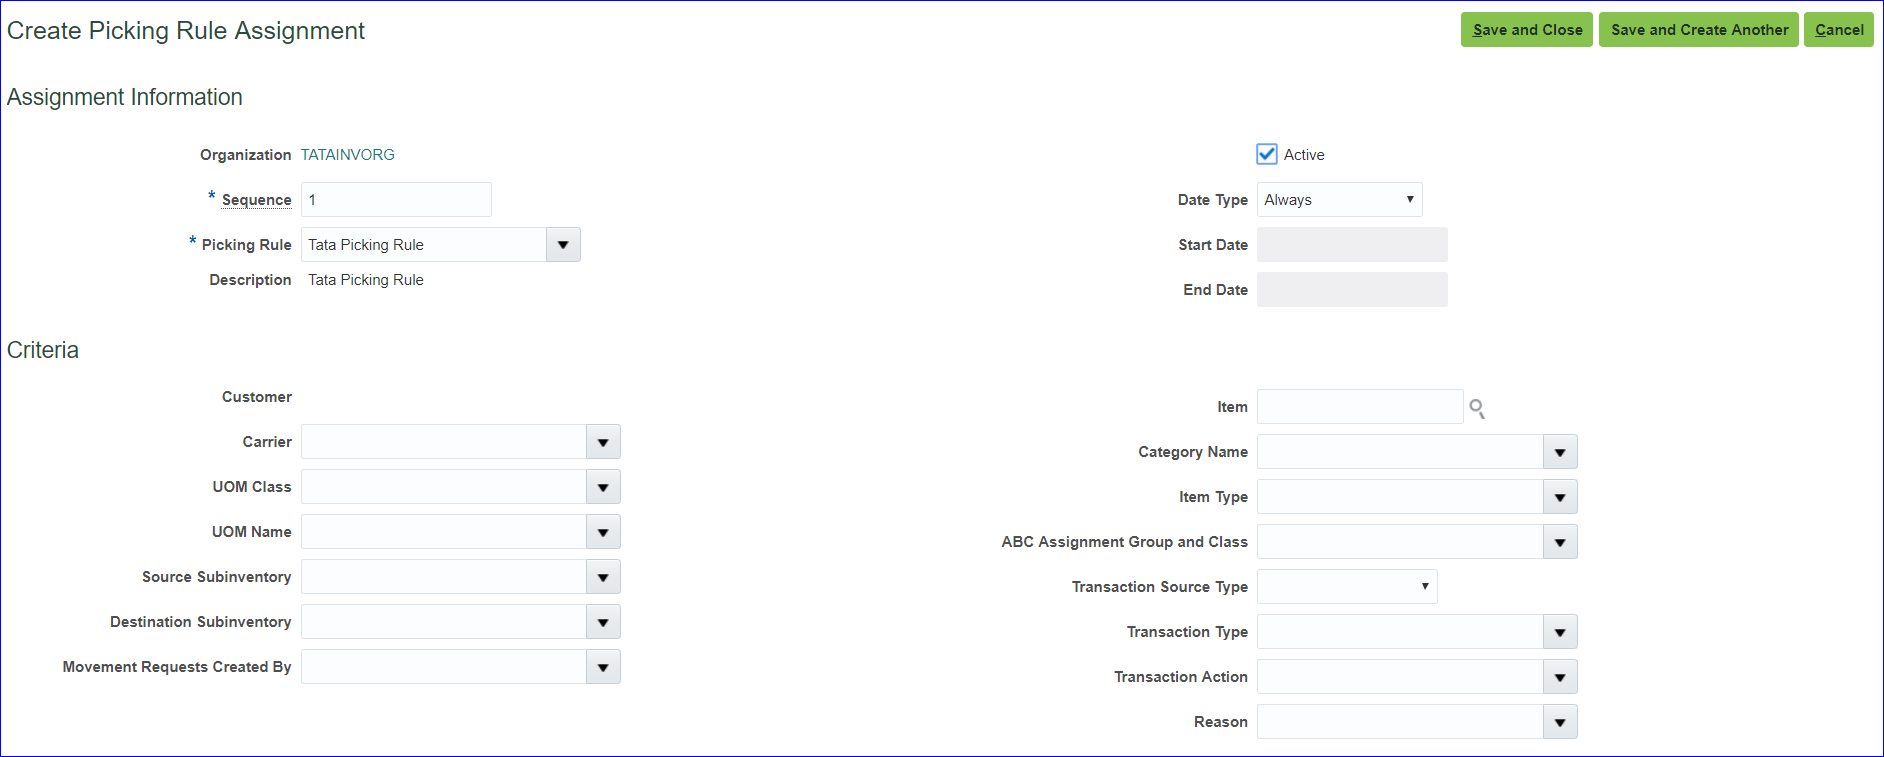
Save and Close >> Done
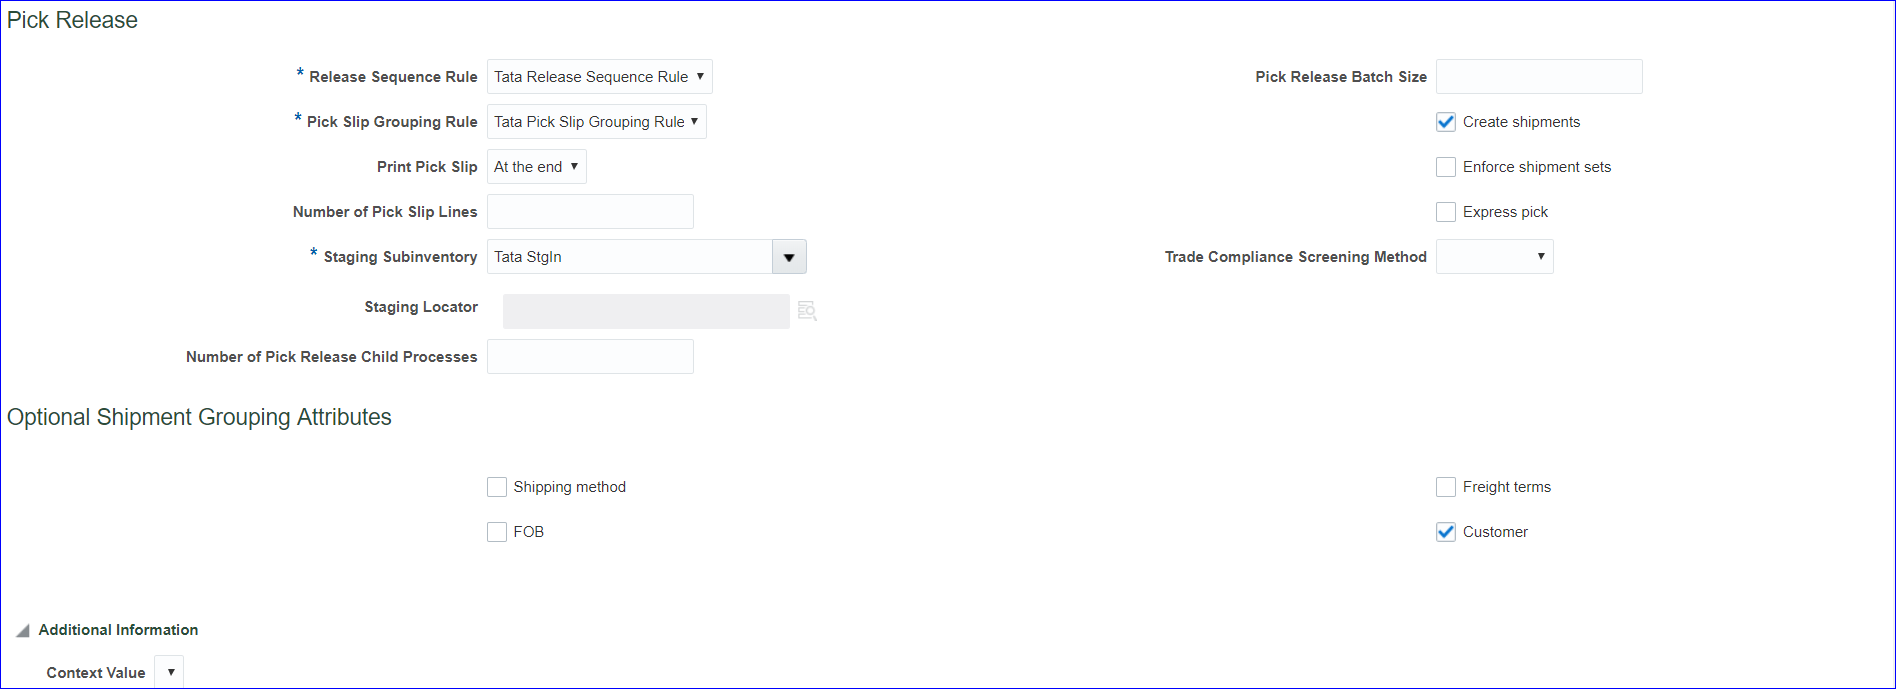
8. Create Pick Wave Release Rules
In EBS this is Pick Slip Release Rule.
Implementation project >> Task ‘Manage Pick Wave Release Rules’ >> Create
Change the Release Status to ‘All’ instead of ‘Unreleased’ as per below image
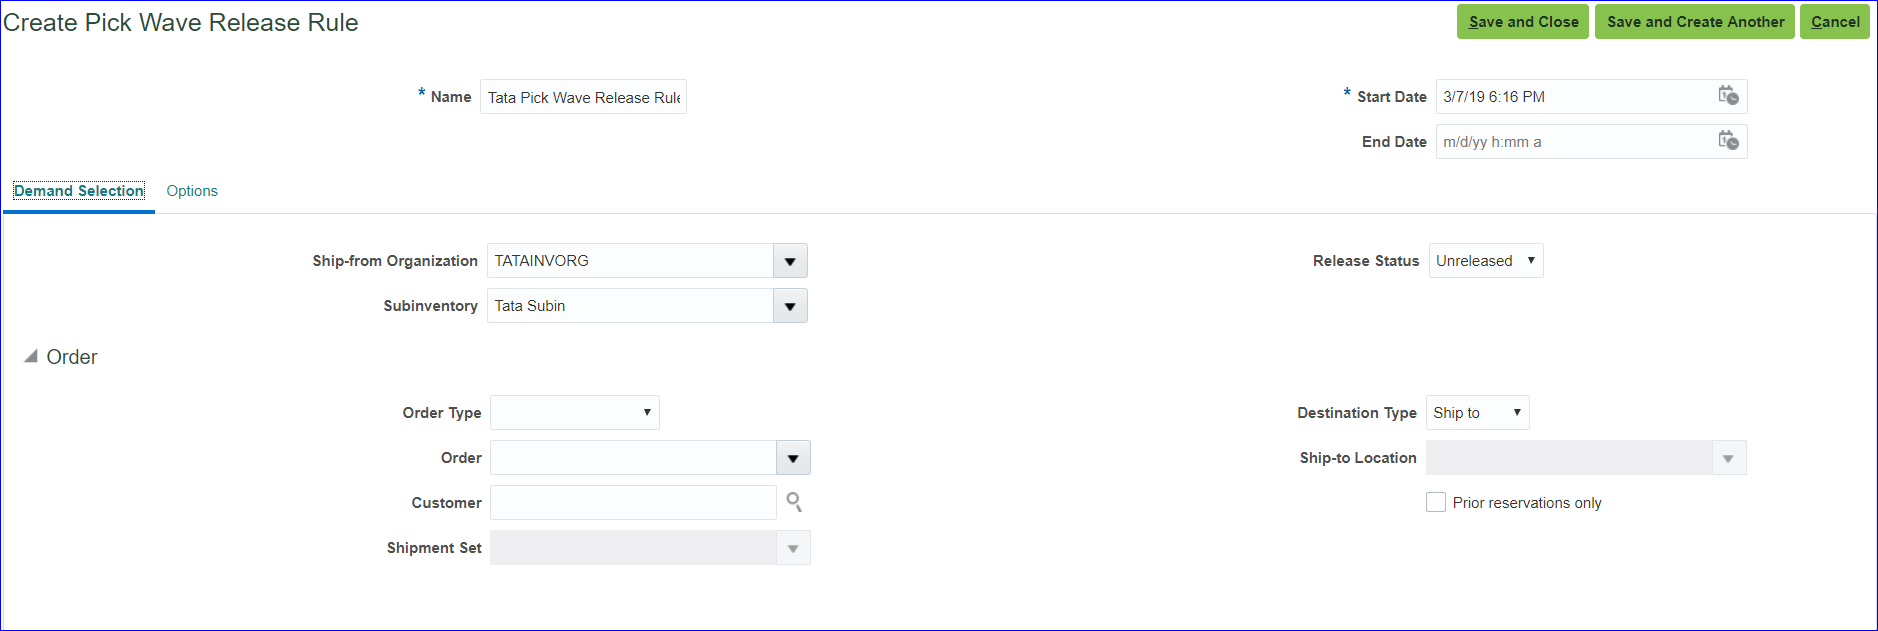
Options tab
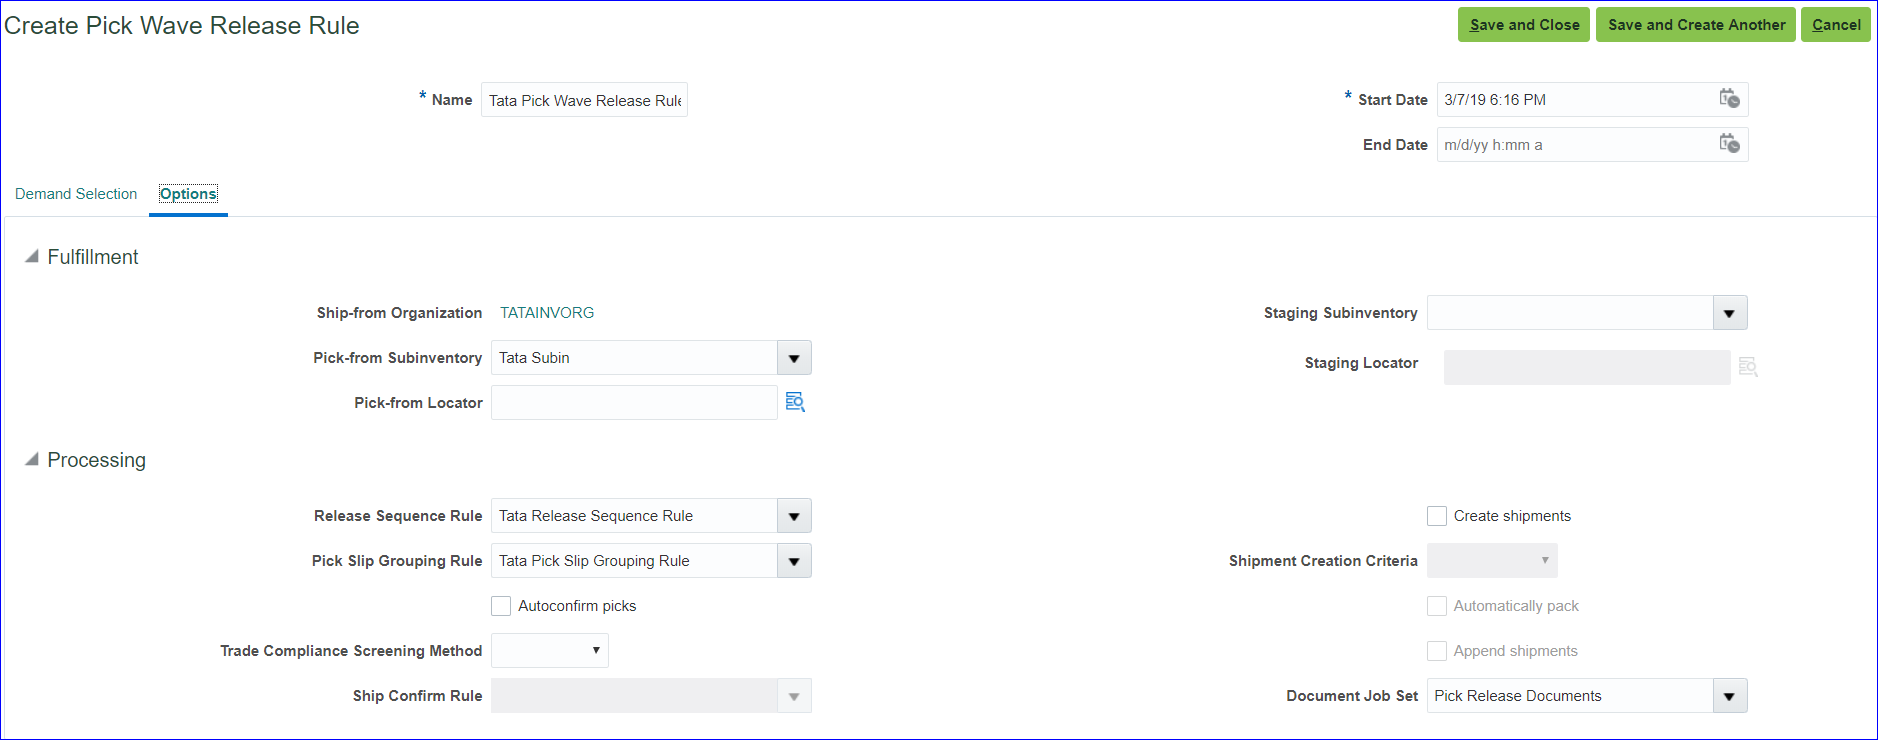
Save and Close
9. Create Staging Subinventory
Implementation project >> Task ‘Manage Subinventories and Locators’ >> Enter Organization (TATAINVORG) >> Create >> Subinventory: Tata StgIn; Description: Tata Staging Subinventory >> Save and Close >> Done
10. Configure Shipping Parameters
Implementation project >> Task ‘Manage Shipping Parameters’
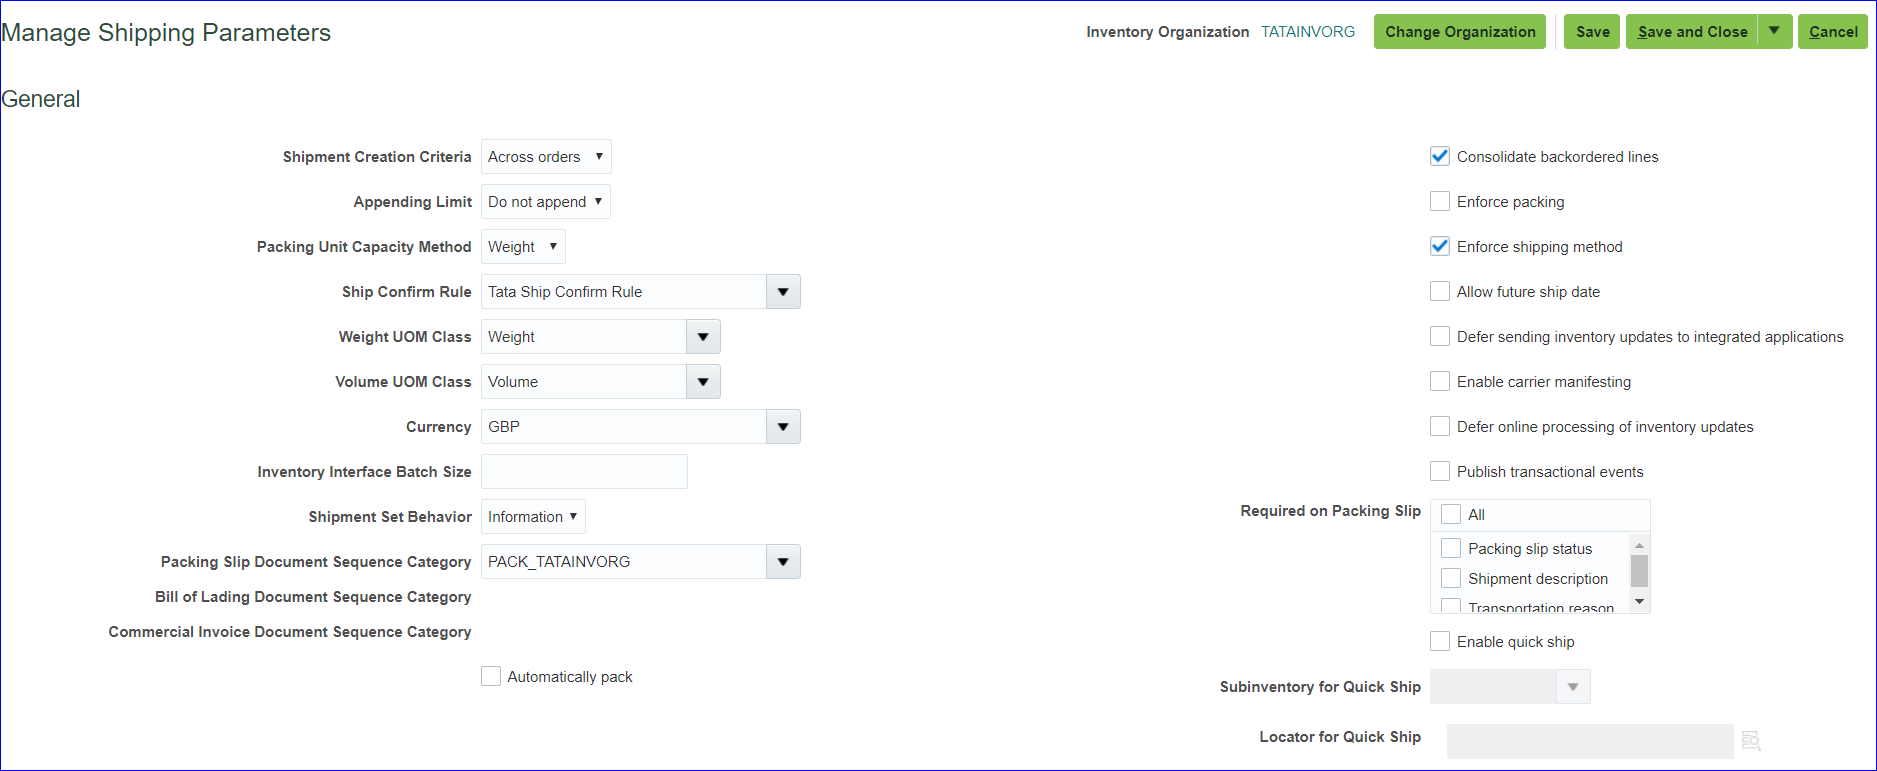
Save and Close
11. Create Collector
Refer to Fusion Accounts Receivable
12. Create Payment Terms
Refer to Fusion Accounts Receivable
13. Create Statement Cycles
Refer to Fusion Accounts Receivable
14. Create Customer profile class
Refer to Fusion Accounts Receivable
15. Create Customer, site and address
Refer to Fusion Accounts Receivable
16. Setup Customer account description
In sales order bill to = Customer account description
Implementation project >> Task ‘Manage Customers’ >> Search your customer >> At Accounts level we can see the Account Description is blank >> Click on account number >> Enter Account description: Tata Customer Account Desc >> Save and Close
17. Assign reference data to BU
Refer to Fusion Accounts Receivable
18. Assign Roles to User
→ Order Manager
→ Pricing Manager (Code: QP)
→ Pricing Analyst
→ Pricing Administrator (Code: QP)
19. Provide data access for user
FSM >> Tasks >> Search >> ‘Manage Data Access for Users’ >> Create
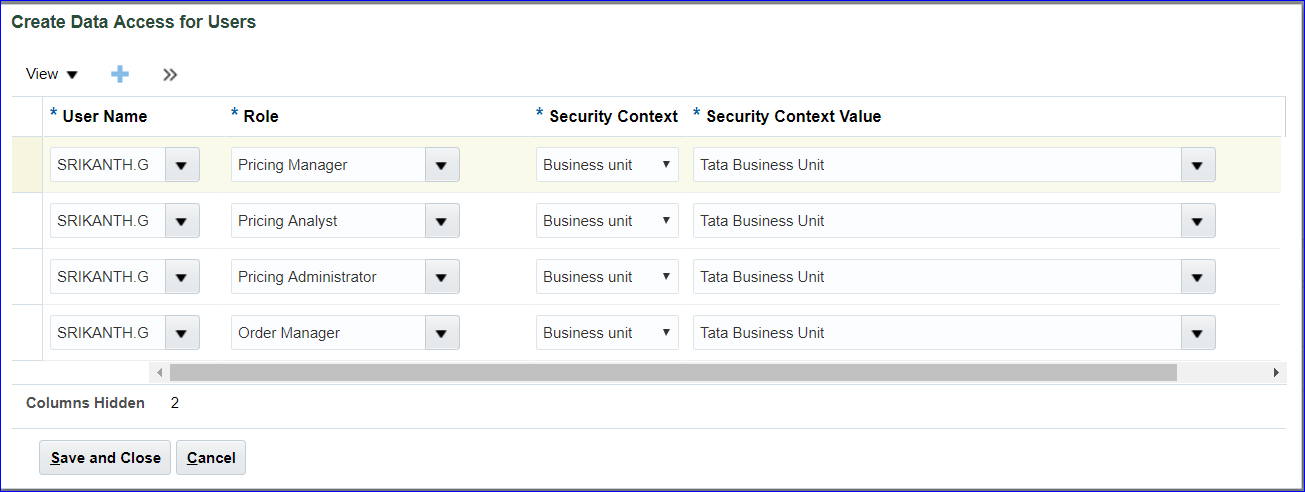
Save and Close
Run ‘Retrieve Latest LDAP Changes’ job.
20. Create Price list
Pricing Administration >> Tasks >> Manage Price Lists >> Create
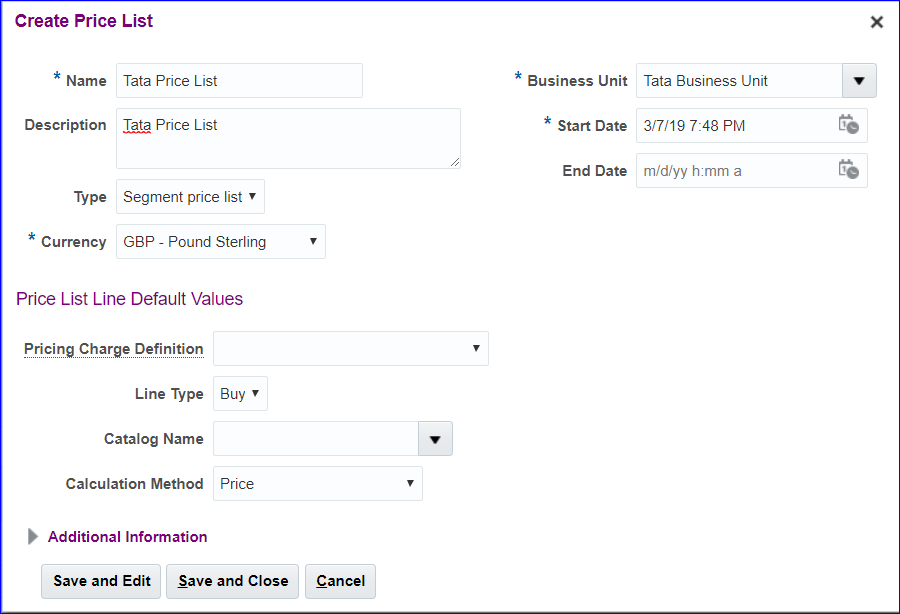
Save and Edit
Under Price List Lines >> Items >> Create

Create Charge
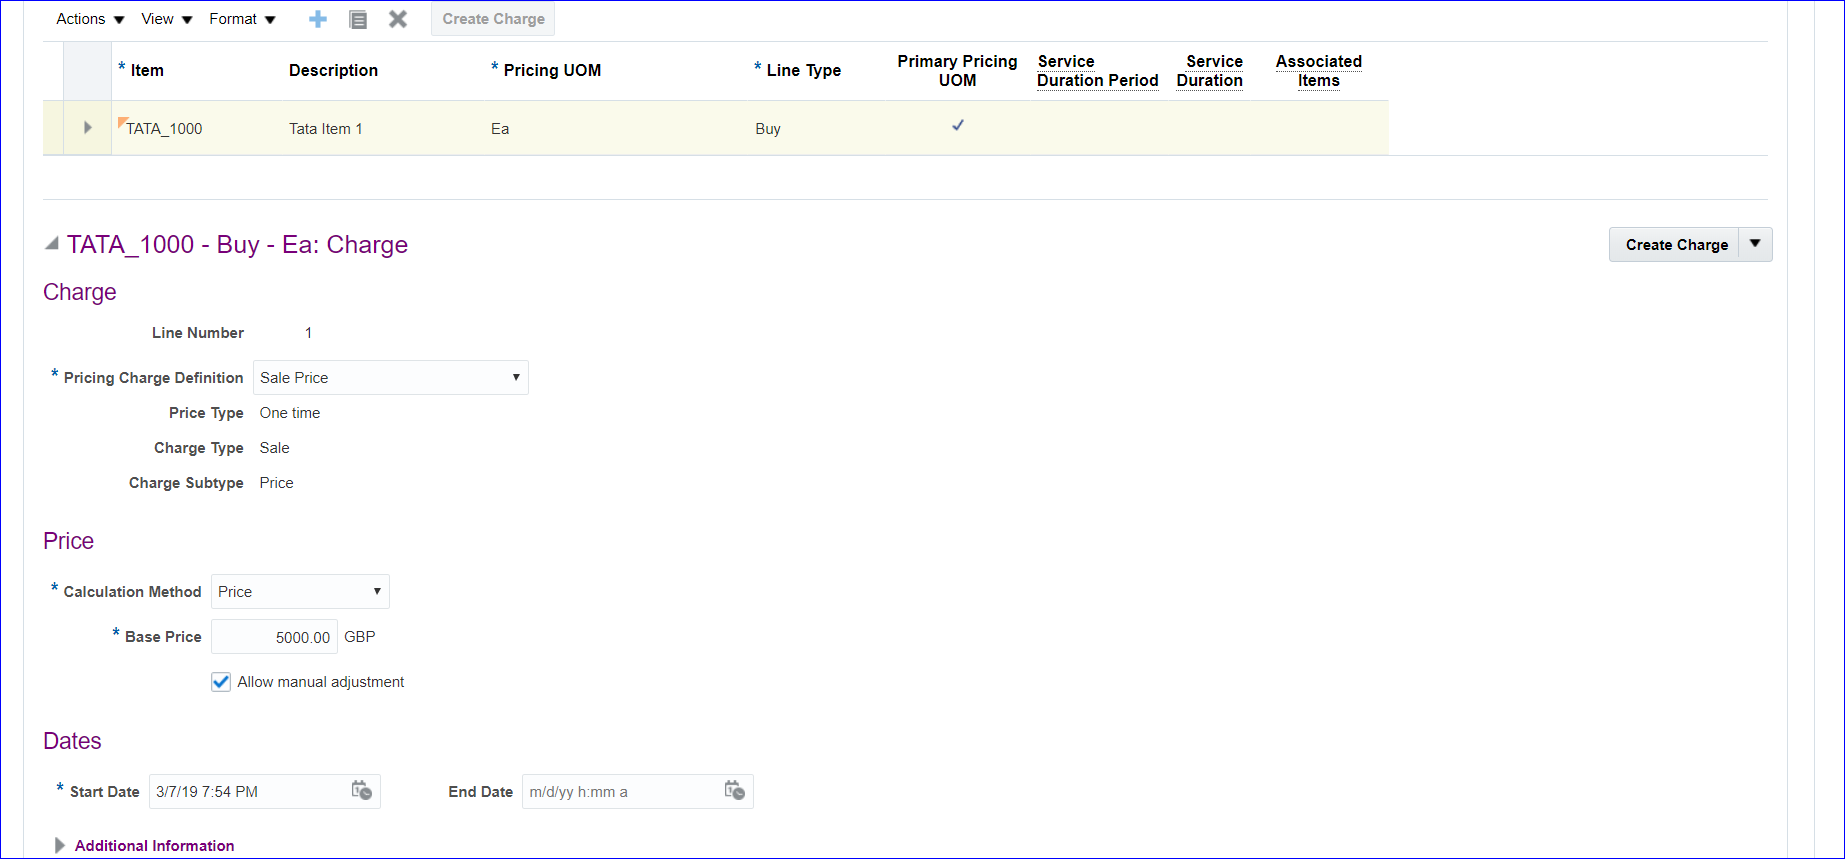
Save and Go to Access Sets tab >> Create >> Enter Set Code: COMMON >> Save >> Approve >> Save and Close >> Search your price list again and make sure the status is Approved.
21. Create Pricing Segment Value (Standard Lookups)
FSM >> Tasks >> Search >> ‘Manage Standard Lookups’ >> In lookup type search with ‘ORA_QP_CUST_PRICING_SEGMENTS’ >> Create
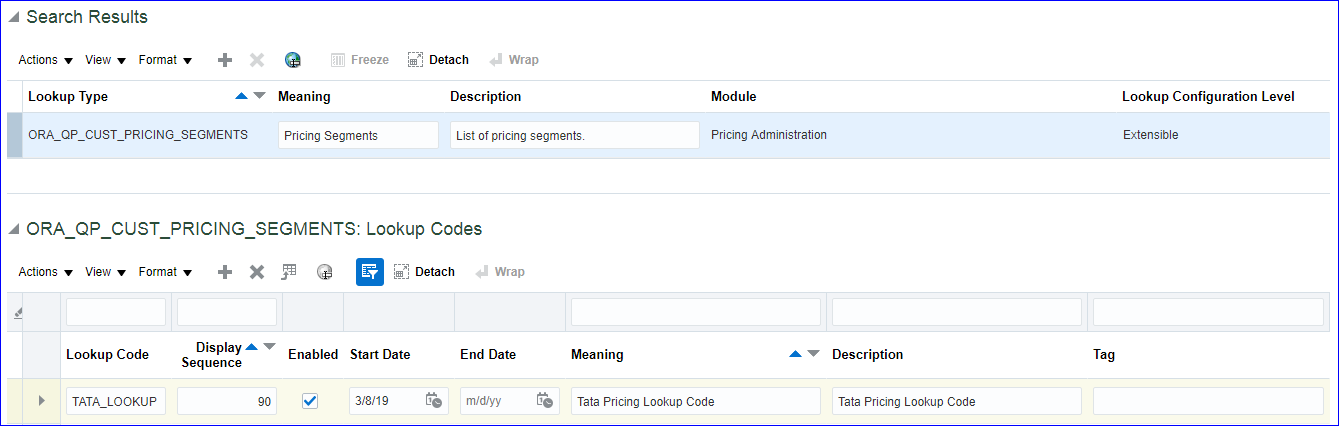
Save and Close
22. Create Pricing Strategy
Pricing Administration >> Tasks >> Manage Pricing Strategies >> Create
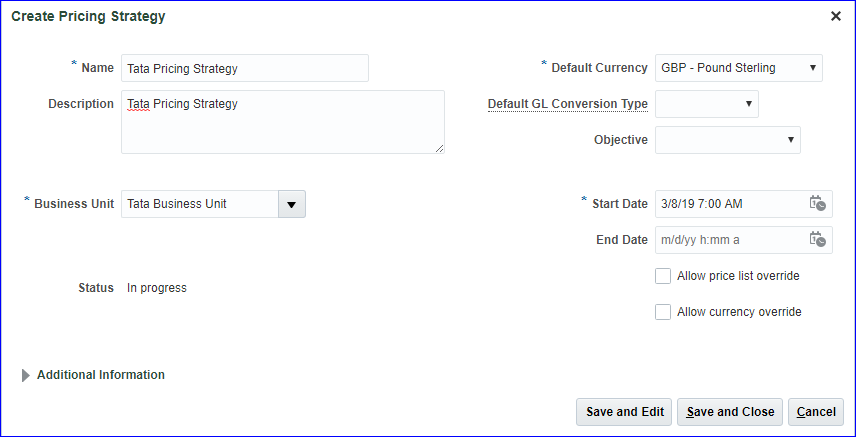
Save and Edit >> Pricing Rules tab >> Price Lists >> Segment Price Lists >> Click on Add >> Search Name: Tata >> Select the line >> Apply >> Ok >> Save >> Approve >> Make sure the status is Approved for Tata Pricing Strategy.
23. Create Customer Pricing Profile
Pricing Administration >> Tasks >> Manage Customer Pricing Profiles >> Create
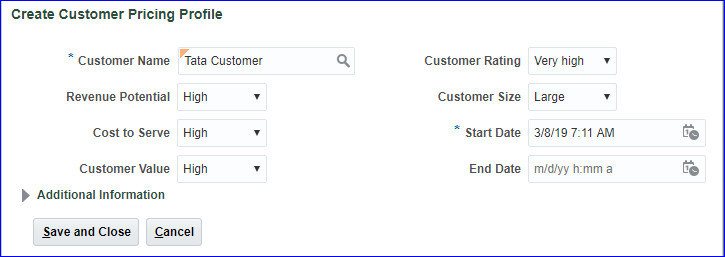
Save and Close >> Done
24. Create Pricing Segments
Pricing Administration >> Tasks >> Manage Pricing Segments >> Create
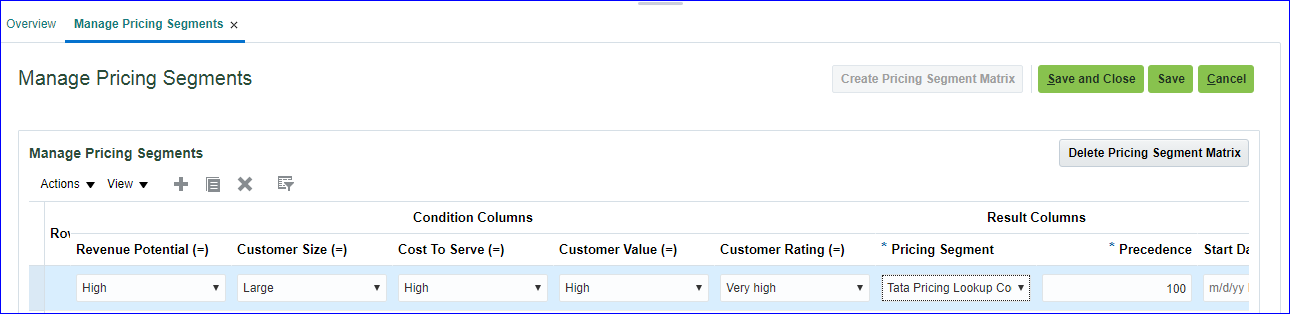
Save and Close
25. Create Pricing Strategy Assignment
Pricing Administration >> Tasks >> Manage Pricing Strategy Assignments >> Create >> Select Header line >> Click on Add row at Assignment level (Header-Sales-All-01/01/2016 22:11: Pricing Strategy Assignment Rules)
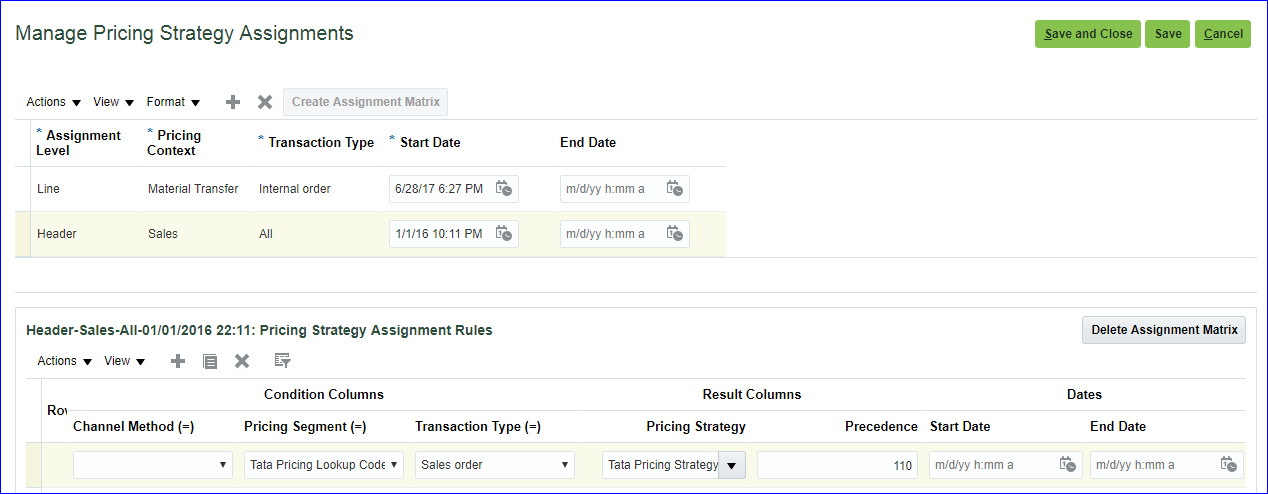
Save and Close
26. Create Carriers (Shipping Methods)
FSM >> Tasks >> Search >> ‘Manage Carriers’ >> Create >> Enter name and Save
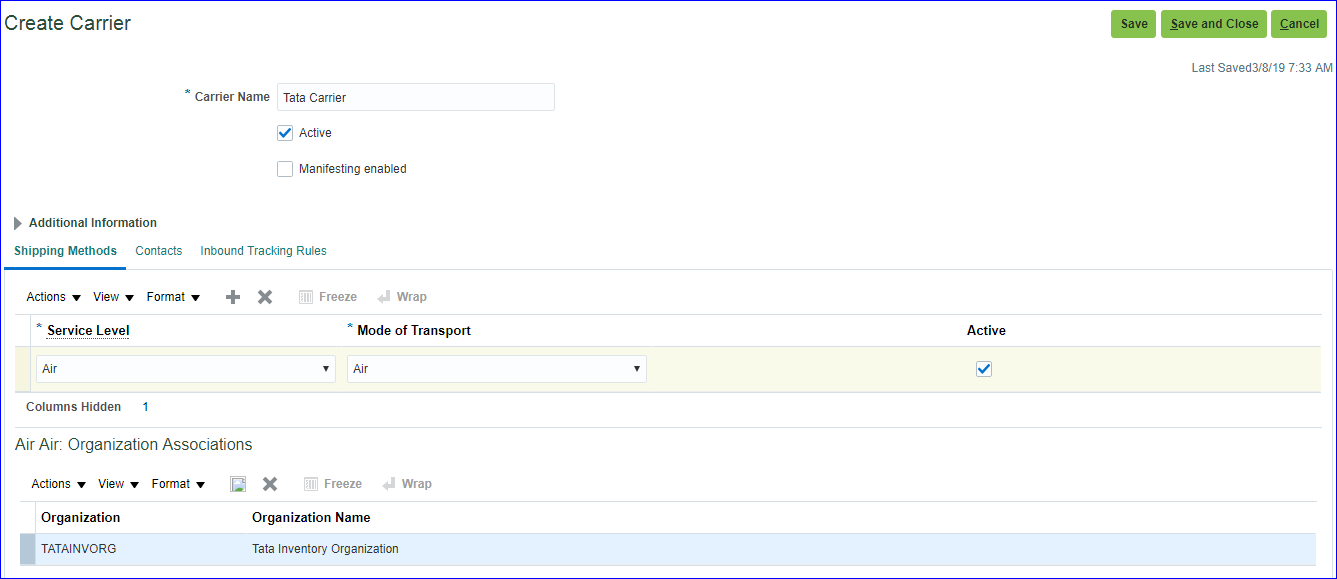
Save and Close
27. Create Transaction Types
Not mandatory so can be ignored 🙂
28. Create Planning Source System
Supply Chain Planning >> Plan Inputs >> Tasks >> Manage Planning Source Systems >> Under Source Systems, select the line which code OPS and click on Manage Organization List >> Refresh Organization List >> Search Tata Organization and enable both Inventory organization and Item organization >> Save and Close >> Done
29. Run “Collect Planning Data”
Supply Chain Planning >> Plan Inputs >> Tasks >> Collect Planning Data >> Source System: OPS
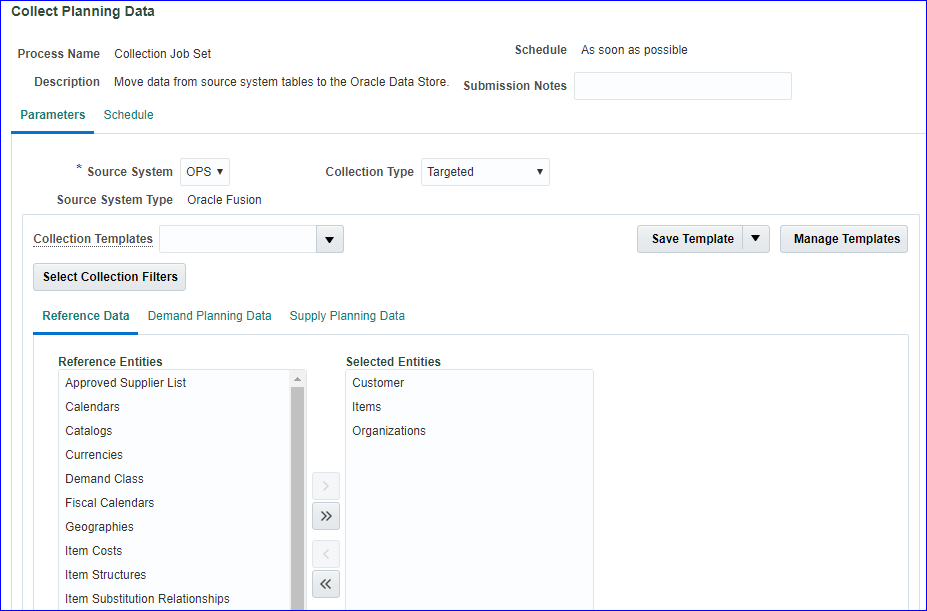
Supply Planning Data tab select On Hand >> Submit
The requests are getting errored due to instance issue 🙁
Submit the request and continue with 39 and 40 video
30. Create Sourcing Rules
31. Setup Sourcing Assignment Set
32. Set profile option: MSP_DEFAULT_ASSIGNMENT_SET
33. Create ATP rules
34. Run “Collect Planning Data”
35. Run “Refresh and Start the Order Promissing Server”
36. Create Sales Order
37. Validate Sales Order
38. Book Sales Order (Submit)
39. Pick Release
40. Confirm Pick Release
41. Confirm Shipping (Ship confirmation)
42. System Interfaces SO Information to AutoInvoice interface
43. Import Sales Order information into AR as AutoInvoice
44. Create Receipt and Apply on Open Transaction