Node JS
Node JS
1. Installation
1. Installation
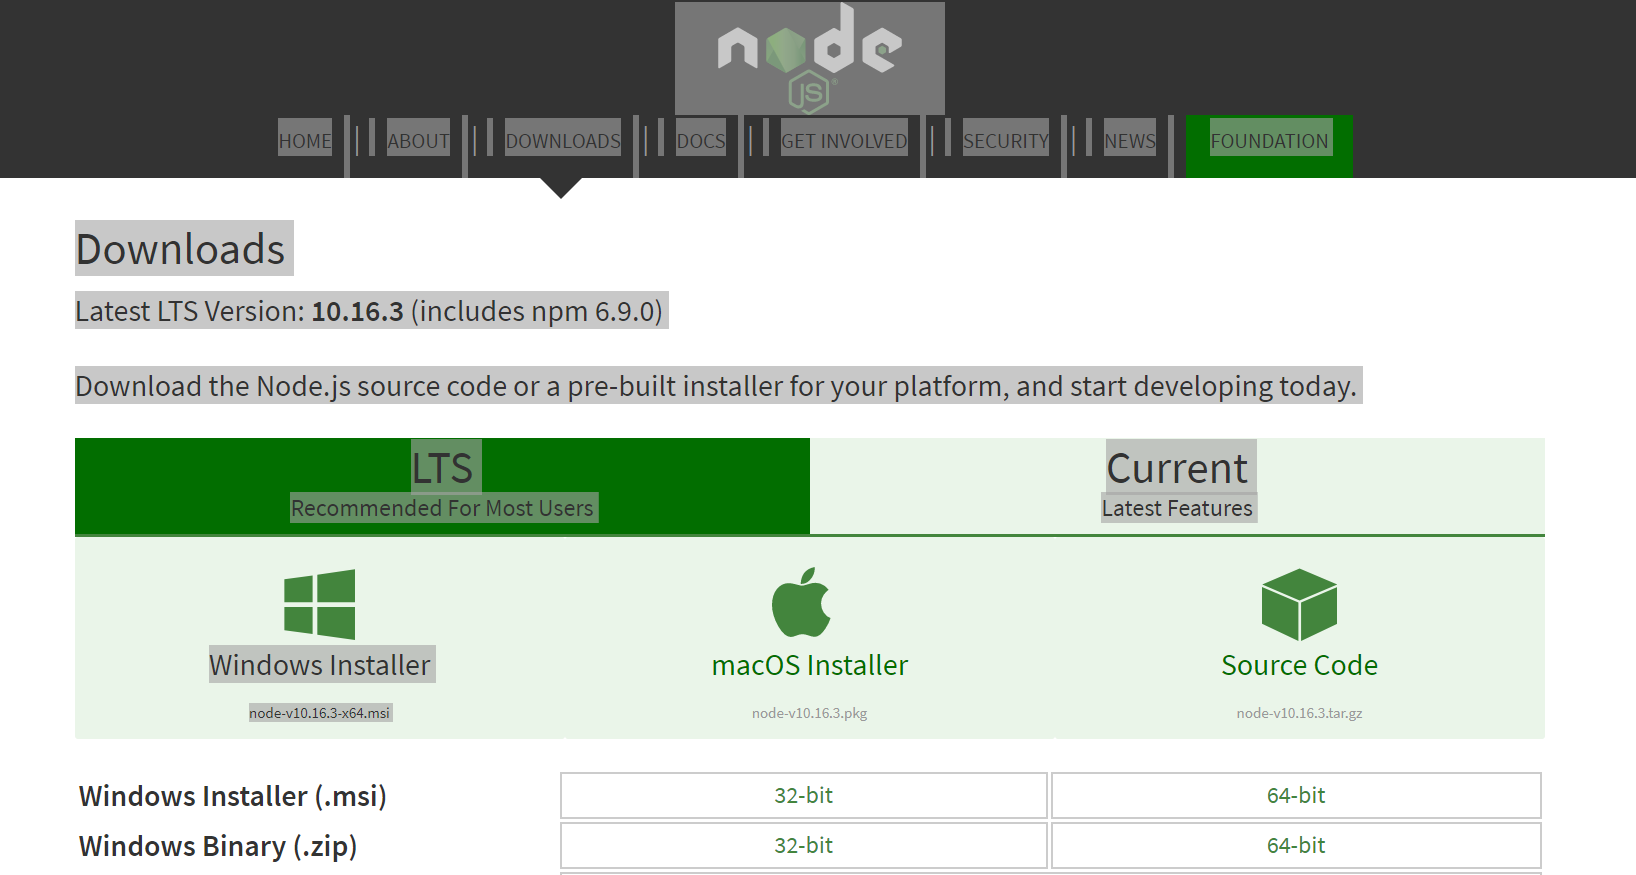
Step1: Go to https://nodejs.org/en/download/ and download the installer based on your requirement.
Step 2: Install Node JS terminal by simply clicking on it and following the instructions
Step 3: Click on Installed App to check version if, it is installed properly
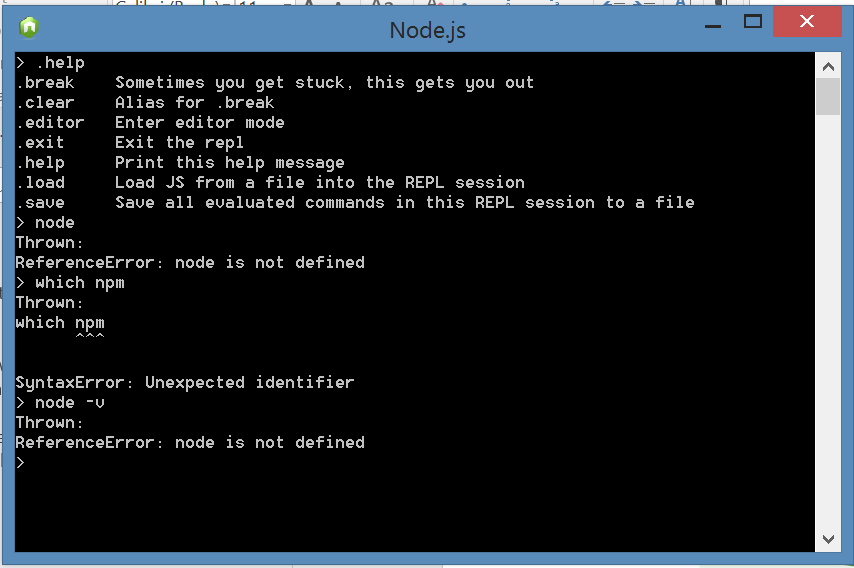
Command is node –v
But as you can see you will get Reference Error saying “Node is not defined”.
You can type .help to get other commands for use but still you can’t check version yet.
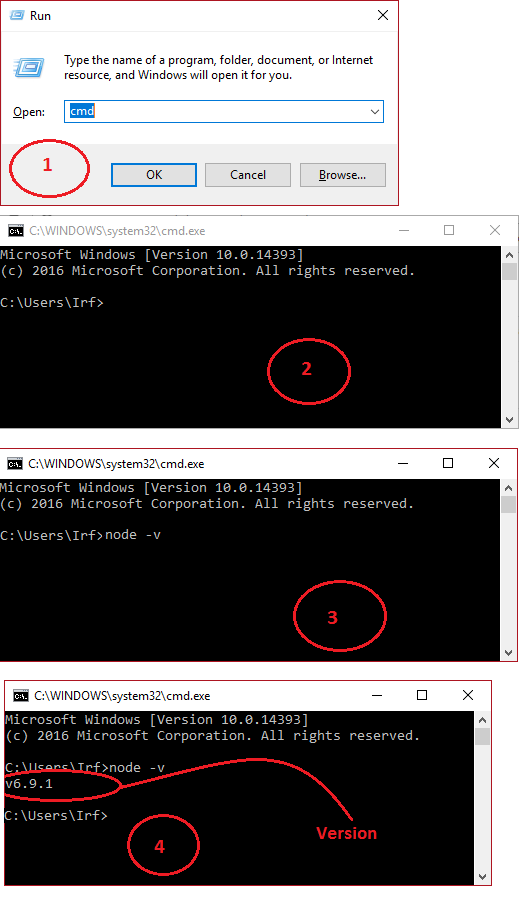
Step 4: To check If Node JS and NPM is installed properly or not, Go to Run and Type cmd
Command Prompt will open. Then Type node –v to check Version of Node JS installed.
Step 5: Node JS installed together with NPM (Node Package Manager) but NPM will not work automatically, if you will type npm –v you will get that NPM is not defined.
Follow following steps so that you can use NPM properly
• Open the Control Panel (Click the Start button, then click Control Panel)
• Click User Accounts
• Click Change my environment variables
• Select PATH and click the Edit… button
• At the end of the Variable value, add ;C:\Program Files\nodejs
• Click Ok on the “Edit User Variable” window, then click Ok on the “Environment Variables” window
• Start a command prompt window (Start button, then type cmd into the search and hit enter)
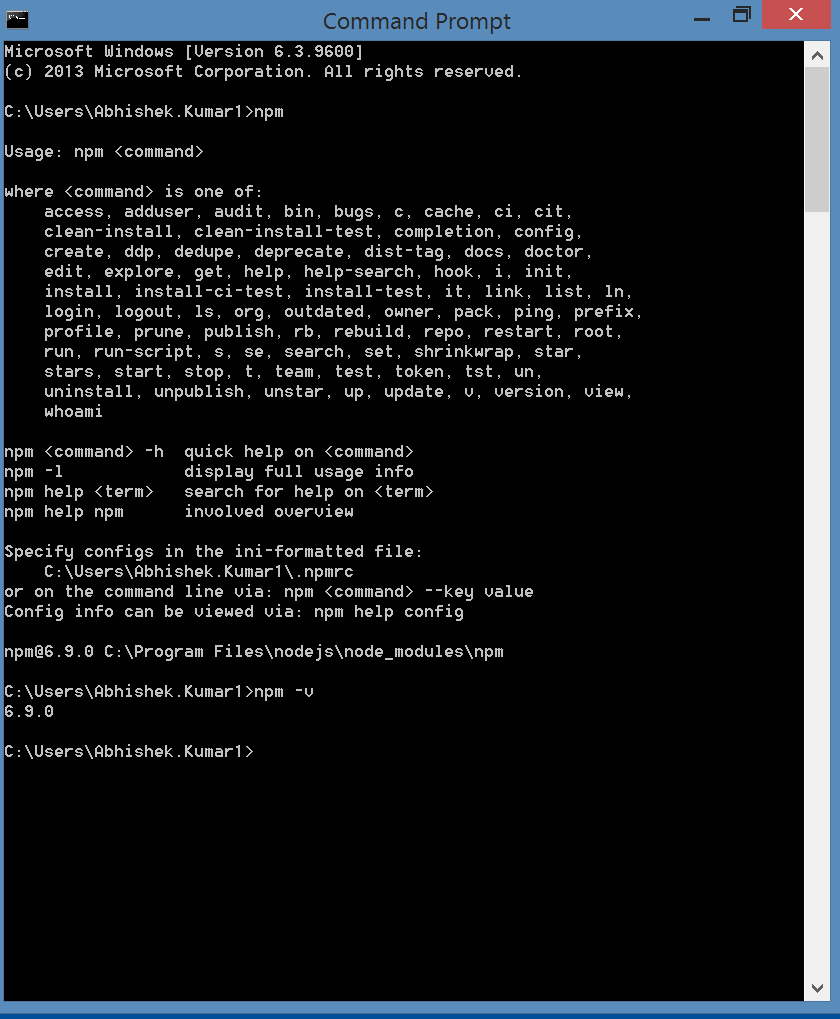
At the prompt (C:\>) type npm and hit enter; you should now see some help text (Usage: npm <command> etc.) rather than “npm is not recognized…”
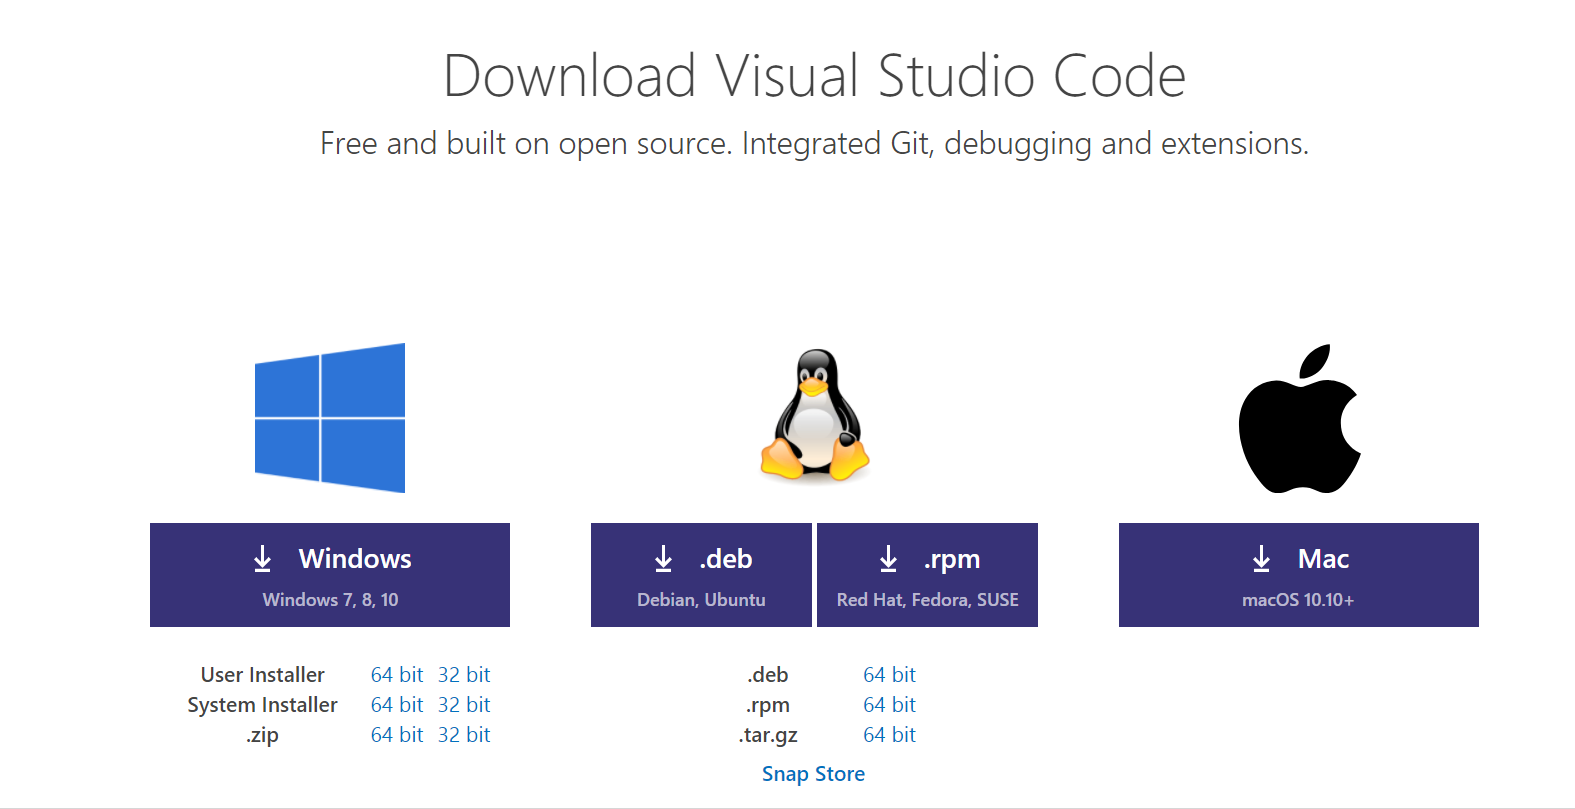
Step 6: To Check and Run Hello World In Node JS using Visual Studio Code, Install Visual Studio Code from https://code.visualstudio.com/download/ Download it and then Install it by clicking on the downloaded file and following instructions.
Step 7: Open Visual Studio and Click on Create File, Name this file and save this file. Before saving this file Create a Folder from Command Prompt
Open cmd
Type
mkdir Hello
then cd Hello
This will create a folder name Hello inside your User Directory. Then Save your js file inside this folder and Use Visual Studio Code to open the file
Type the following into file and Save
var message = "Hello World";
console.log(message);
Step 8: Click on Terminal and Run from upper menu of VSCode
Type node Hello.js
This will compile it and print Hello World in Console.
Step 9: Installing Express from Terminal
Express is a very popular application framework for building and running Node.js applications. You can scaffold (create) a new Express application using the Express Generator tool. The Express Generator is shipped as an npm module and installed by using the npm command-line tool npm.
Tip: To test that you’ve got npm correctly installed on your computer, type npm –help from a terminal and you should see the usage documentation.
Install the Express Generator by running the following from a terminal:
npm install -g express-generator
The -g switch installs the Express Generator globally on your machine so you can run it from anywhere.
We can now scaffold a new Express application called myExpressApp by running:
express myExpressApp --view pug
This creates a new folder called myExpressApp with the contents of your application. The –view pugparameters tell the generator to use the pug template engine (formerly known as jade).
To install all of the application’s dependencies (again shipped as npm modules), go to the new folder and execute npm install:
cd myExpressApp
npm install
At this point, we should test that our application runs. The generated Express application has a package.json file which includes a start script to run node ./bin/www. This will start the Node.js application running.
From a terminal in the Express application folder, run:
npm start
Tip: You can enable an explorer for the npm scripts in your workspace using the npm.enableScriptExplorer setting.
The Node.js web server will start and you can browse to http://localhost:3000 to see the running application.
Step 10: Installing REACT
Read https://www.liquidweb.com/kb/install-react-js-windows/
Follow all instructions and Install REACT